Setting up your DIY makerspace can feel like a big task, but it’s all about making a space that inspires you. Start with a clean slate. Clear out any clutter in your garage or basement and think about how you want to use the space. Do you envision a cozy corner for woodworking, or a bright area for electronics? Whatever it is, make sure it's inviting.
Lighting is key in a makerspace. Natural light is great, so try to take advantage of windows if you have them. If not, strong overhead lights and some task lighting over your work surface will help you see what you’re doing. A well-lit area keeps your mood up and helps you stay focused on those crafty projects.
Next up, let’s talk about organization. A good makerspace isn’t just about the tools you have; it’s also about keeping everything in order. Use pegboards for hanging tools, clear bins for supplies, and consider a rolling cart for easy access to everything you need. This is where a solid makerspace setup guide can really help. You want everything to have its own home, so you spend less time searching and more time creating.
Finally, make sure you’re comfortable. Adding a sturdy workbench is essential, but don’t forget about ergonomic factors. A good stool or mat for standing will save your back during those long project sessions. Keep some refreshments nearby, too; a little snack can keep the energy high while you’re deeply focused on your work. Your makerspace should be a place where you love to spend time, so make it cozy!
Choosing the Right Tools for Your Space
When you’re diving into your makerspace setup guide, picking the right tools can feel overwhelming. But it doesn’t have to be. Start by considering what projects you want to tackle. Are you into woodworking, metalworking, or maybe 3D printing? Focusing on your interests helps narrow down the tools you'll need.
Next, think about your available space. If you're tight on room, go for versatile tools that can handle multiple tasks. For example, a compact router is great for edges and detailing. A multi-tool can cut, sand, and scrape—ideal for small workshops. If you've got a little more space to play with, investing in a table saw or a drill press can make your life a lot easier for bigger projects.
Don't forget about safety gear. A good makerspace setup guide will remind you that you'll want to protect yourself while you work. Invest in a quality dust mask, safety goggles, and ear protection. Your health is important, especially in a space where you might deal with wood dust or loud machinery.
Finally, be practical about your budget. Quality tools can save you money in the long run, but you don’t have to go for top-dollar brands right away. Try starting with a few essential pieces and gradually build your collection as you get more into your projects. This approach keeps things manageable and lets you figure out what tools you truly need.
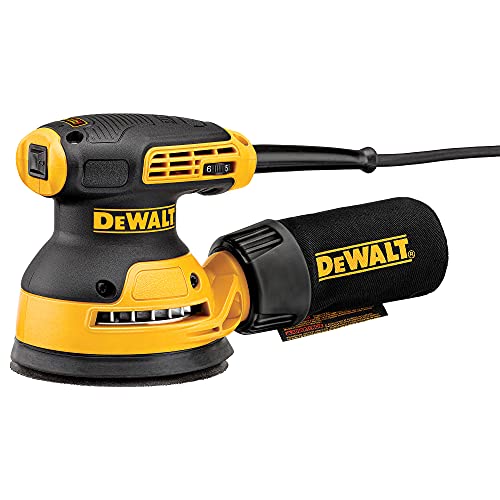
Dewalt DWE6423 Random Orbit Sander
Get a smooth finish on your projects with this powerful and easy-to-use random orbit sander
Product information
$99.01 $84.00
Product Review Score
4.56 out of 5 stars
113 reviewsProduct links
Storage Solutions for Better Organization
Your DIY makerspace setup guide isn't complete without smart storage solutions. Keeping your space organized is key to making the most of your projects. When everything has its place, you’ll spend less time searching for tools and materials and more time creating.
Here are some great storage ideas to consider:
Don't forget about pegboards! They’re perfect for hanging tools and making them easy to grab. Plus, they add a bit of character to your space. With the right storage solutions in place, your makerspace will become a creative haven where you can focus and let your imagination run wild. Check out this makerspace setup guide to find more tips and tricks to make your space work for you.
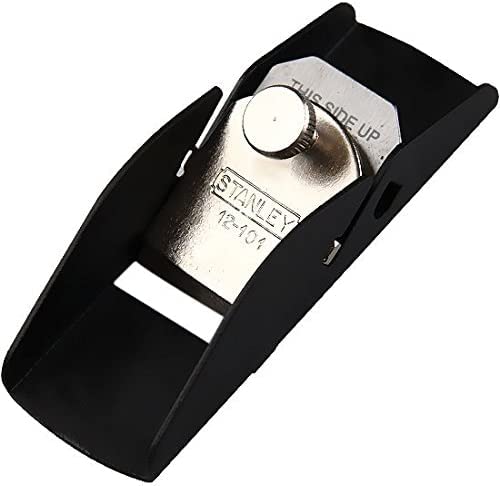
Stanley Mini Handheld Planer for Woodworking
Get smooth, even cuts with this handy tool that’s perfect for all your woodworking projects
Product information
$11.40
Product Review Score
4.4 out of 5 stars
105 reviewsProduct links
Lighting Ideas for Your Workshop Comfort
Lighting can make a big difference in your workshop. You want bright, even light that helps you see what you’re working on without straining your eyes. Choosing the right lighting is key in a makerspace setup guide. Here are some ideas to get you started.
Consider using LED strip lights. They’re super easy to install and you can stick them under shelves or cabinets to light up dark corners. Plus, they’re energy-efficient and last a long time. Another great option is a pair of adjustable work lights. You can position them exactly where you need them and they pack a punch when it comes to brightness.
Don’t forget about overhead lighting! Ceiling-mounted fixtures provide a nice, even glow throughout the entire space. Look for fixtures that fit your style. There are plenty of industrial-looking options that can make your workshop feel more polished.
Task lighting is another must-have for focused work areas. A bright desk lamp or clamp-on light can help when you are working on intricate details. This makes it easier to see your work without shadows getting in the way.